Resorts Gal Ride Sheets (A Free Disney World Ride Spreadsheet To Help You Plan)

One of the most significant parts of planning a Walt Disney World vacation is deciding which rides are a priority. Those decisions are often challenging based on your party’s makeup. Terms like height requirements, Lightning Lanes, early entry, and extended evening hours come into play. These are, for the most part, things you’ll want to be aware of before your vacation.
We have numerous guides on Resorts Gal discussing each of these terms. But sometimes, a simple spreadsheet is the best way to provide an overview. So, I created a free Disney World Ride Spreadsheet to share with you. This spreadsheet was prepared with Google Sheets and contains four tabs, one for each park.
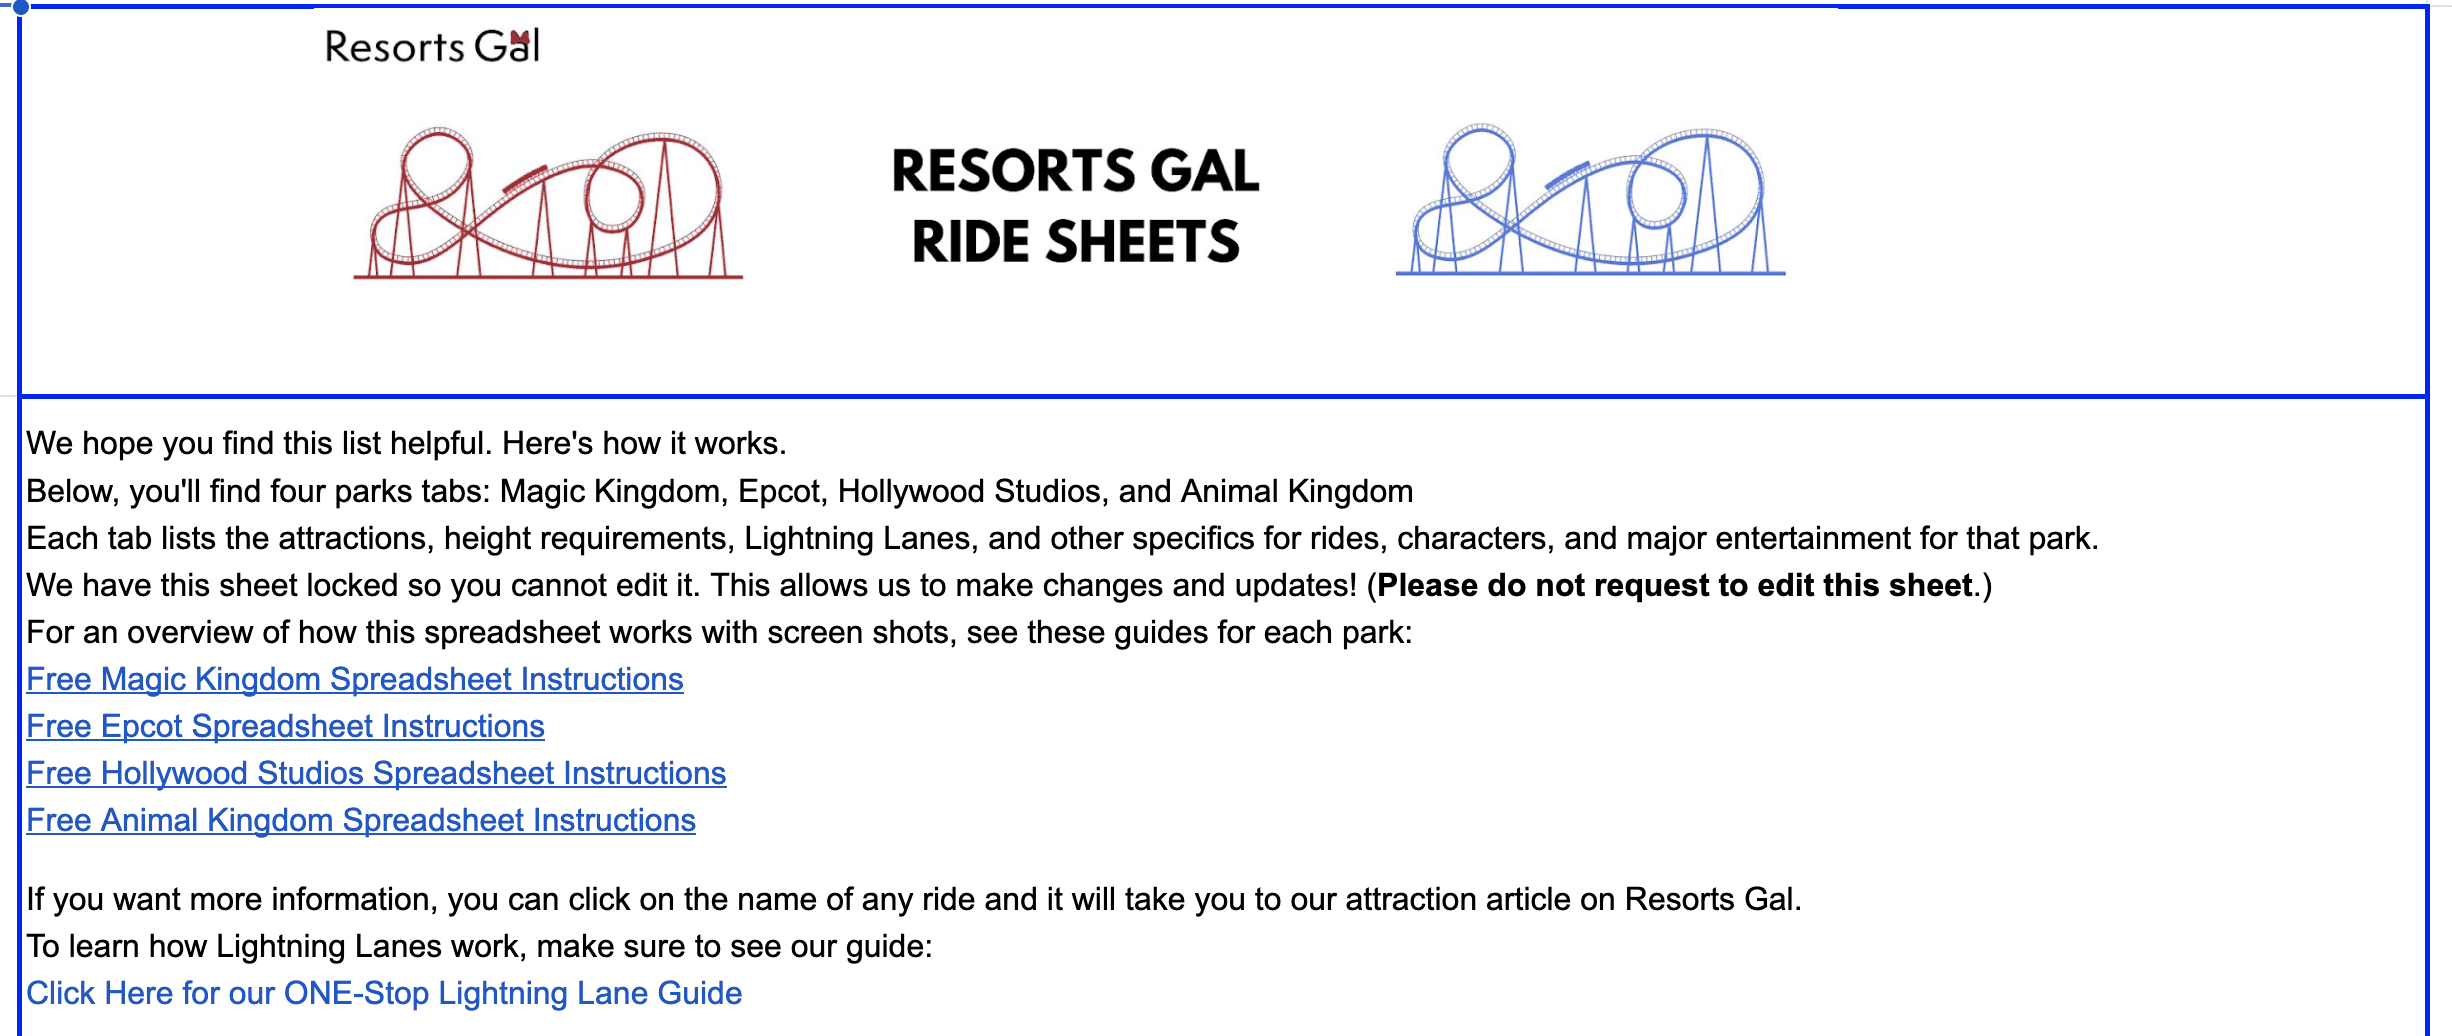
Below, we’ll go over the basics of how to use the free ride spreadsheet. Then at the end of this article, you can request to access it. Here is a photo of the Start Here tab when you initially open it. The Start Here tab has links to the instruction guides for each park. For the most part, the spreadsheet is fairly self-explanatory. But I’ve written a separate instruction guide for each park that offers examples specific to that park.
How to Access the Spreadsheet
Once you request access, you’ll receive an email with a link to the spreadsheet. You must have a Google account to access it. If you’re using a mobile device, you must download the Google Sheets app and sign in via your Google account (Gmail) to access it. After that, you can open the Google Sheets app and select the sheet. (If you already use Google Sheets, it will just show up in your account after you open it.)
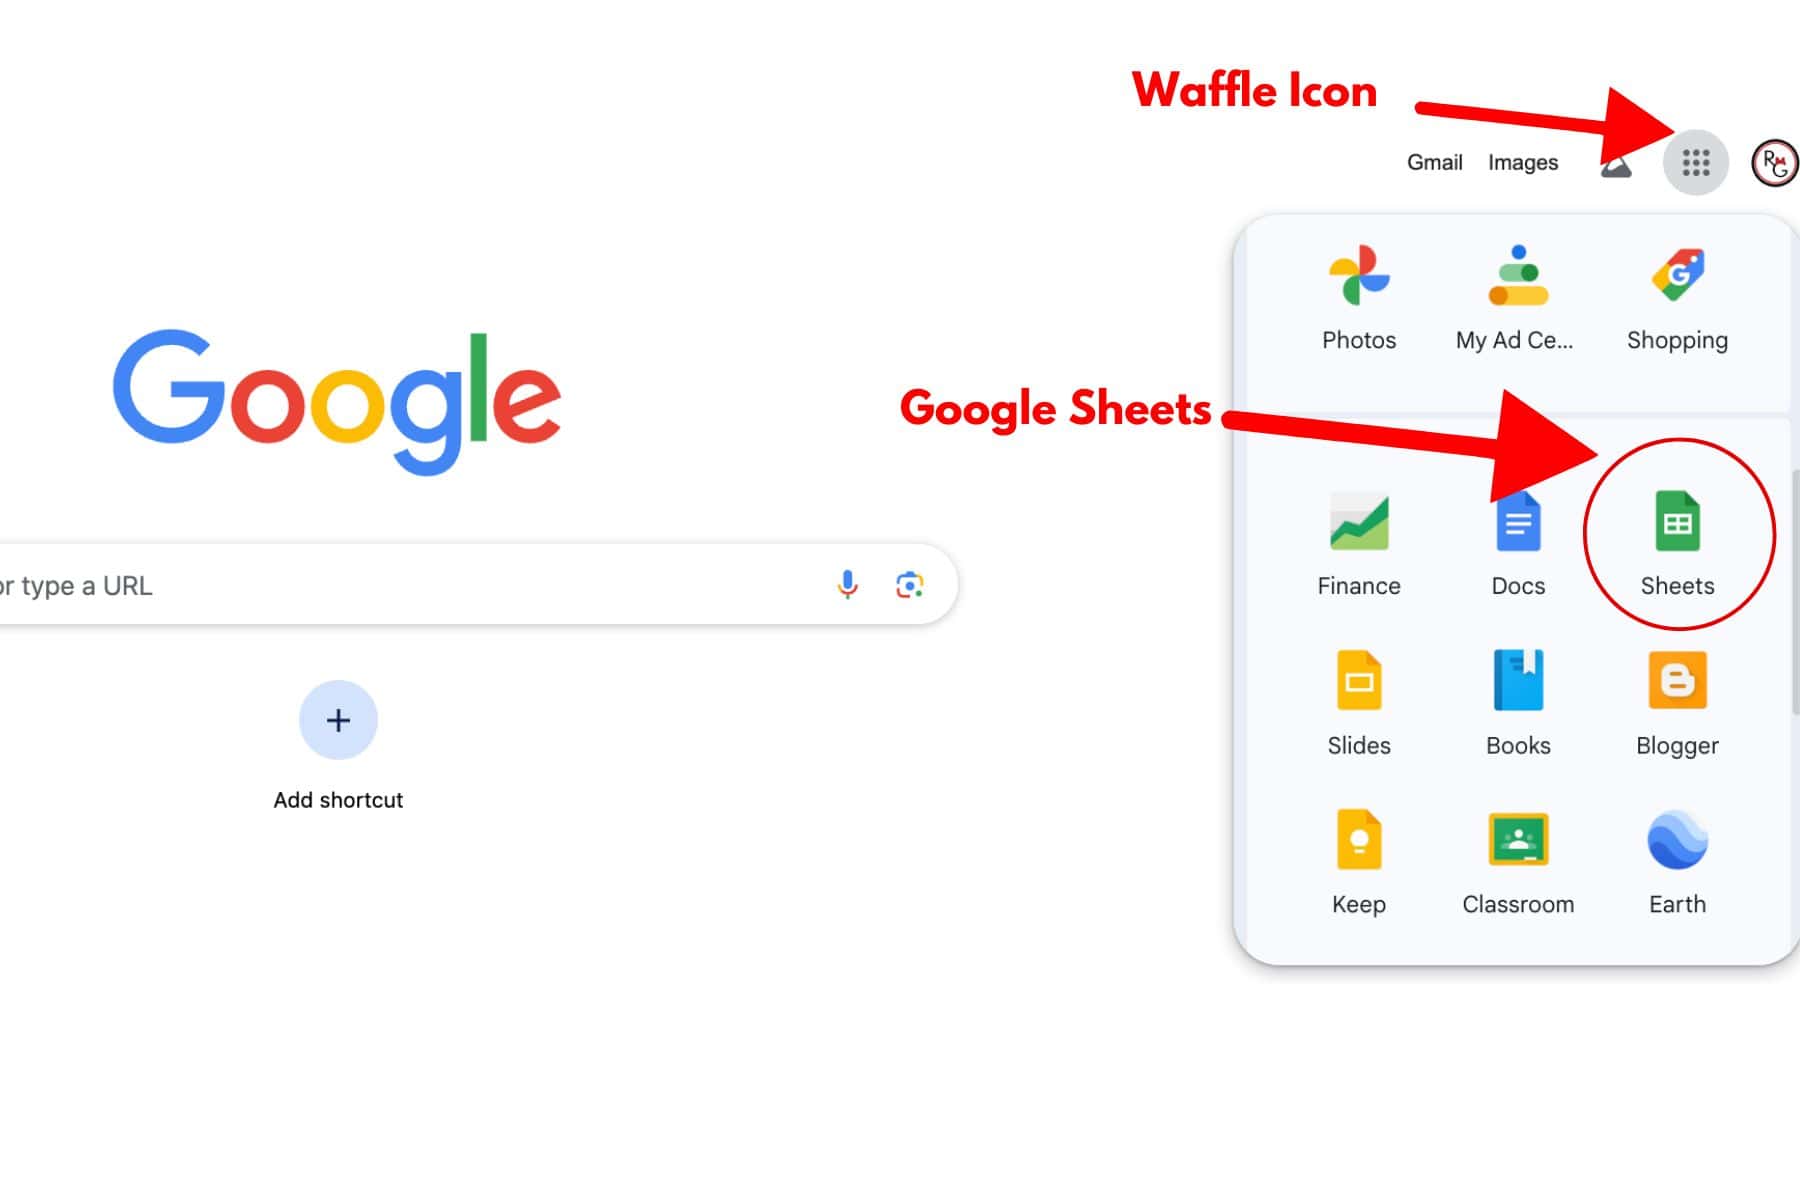
When you open the link to the spreadsheet on a regular computer, it opens in a Google browser (as long as you use Google as your preferred search engine). It is then automatically saved to your account. To access it later from a desktop computer or laptop, select the waffle icon in the top right-hand corner of your screen. Then, scroll down and select “Sheets” from the list. You should now see the spreadsheet.
Here’s a screenshot that shows how to find the spreadsheet on your computer in the future.
Note: This particular spreadsheet is not editable, so please do not request to make a copy of it. When we become aware of park changes, we make those adjustments. You’ll also want to be aware of these things.
- Many changes will occur at Walt Disney World over the next five to ten years. Some rides or areas of certain parks might be under construction or down for refurbishment. If you’re looking forward to a specific ride, we recommend checking Disney’s Ride Refurbishment Calendar before your visit.
- Characters and entertainment are subject to change. We always recommend checking the My Disney Experience app on the day of your visit to locate characters. Here’s an excerpt I put together with instructions. (All the character meet-and-greets we’ve included on the spreadsheet meet regularly. But it’s important to stress that things can change.)
How to Locate Characters in the My Disney Experience App
- Open the My Disney Experience app and select the pin drop at the bottom of the home screen.
- Scroll (left to right) through the icons at the top of the screen and select “Characters.”
- After selecting characters, use the locations drop down to select the park of your choice.
- Then, on the bottom right of the screen, select “Show List.”
- Scroll through the list of characters with their times and locations.
- As an alternative, you can use the map view to locate characters.
*As the day passes, you might notice that characters disappear from the app. When their last scheduled time passes, the meet-and-greet automatically disappears. A new schedule won’t be loaded until the following day. It is essential to check the app for meet-and-greets on the day of your visit.
Learn More: Complete Screenshot Tutorial for Locating Characters at Disney World
How to Use the Spreadsheet
We’ll start with an overview of the Magic Kingdom ride tab. Each park has a tab listed across the bottom of the spreadsheet. The tabs are below the last row and labeled: Start Here, Magic Kingdom, Epcot, Hollywood Studios, and Animal Kingdom.
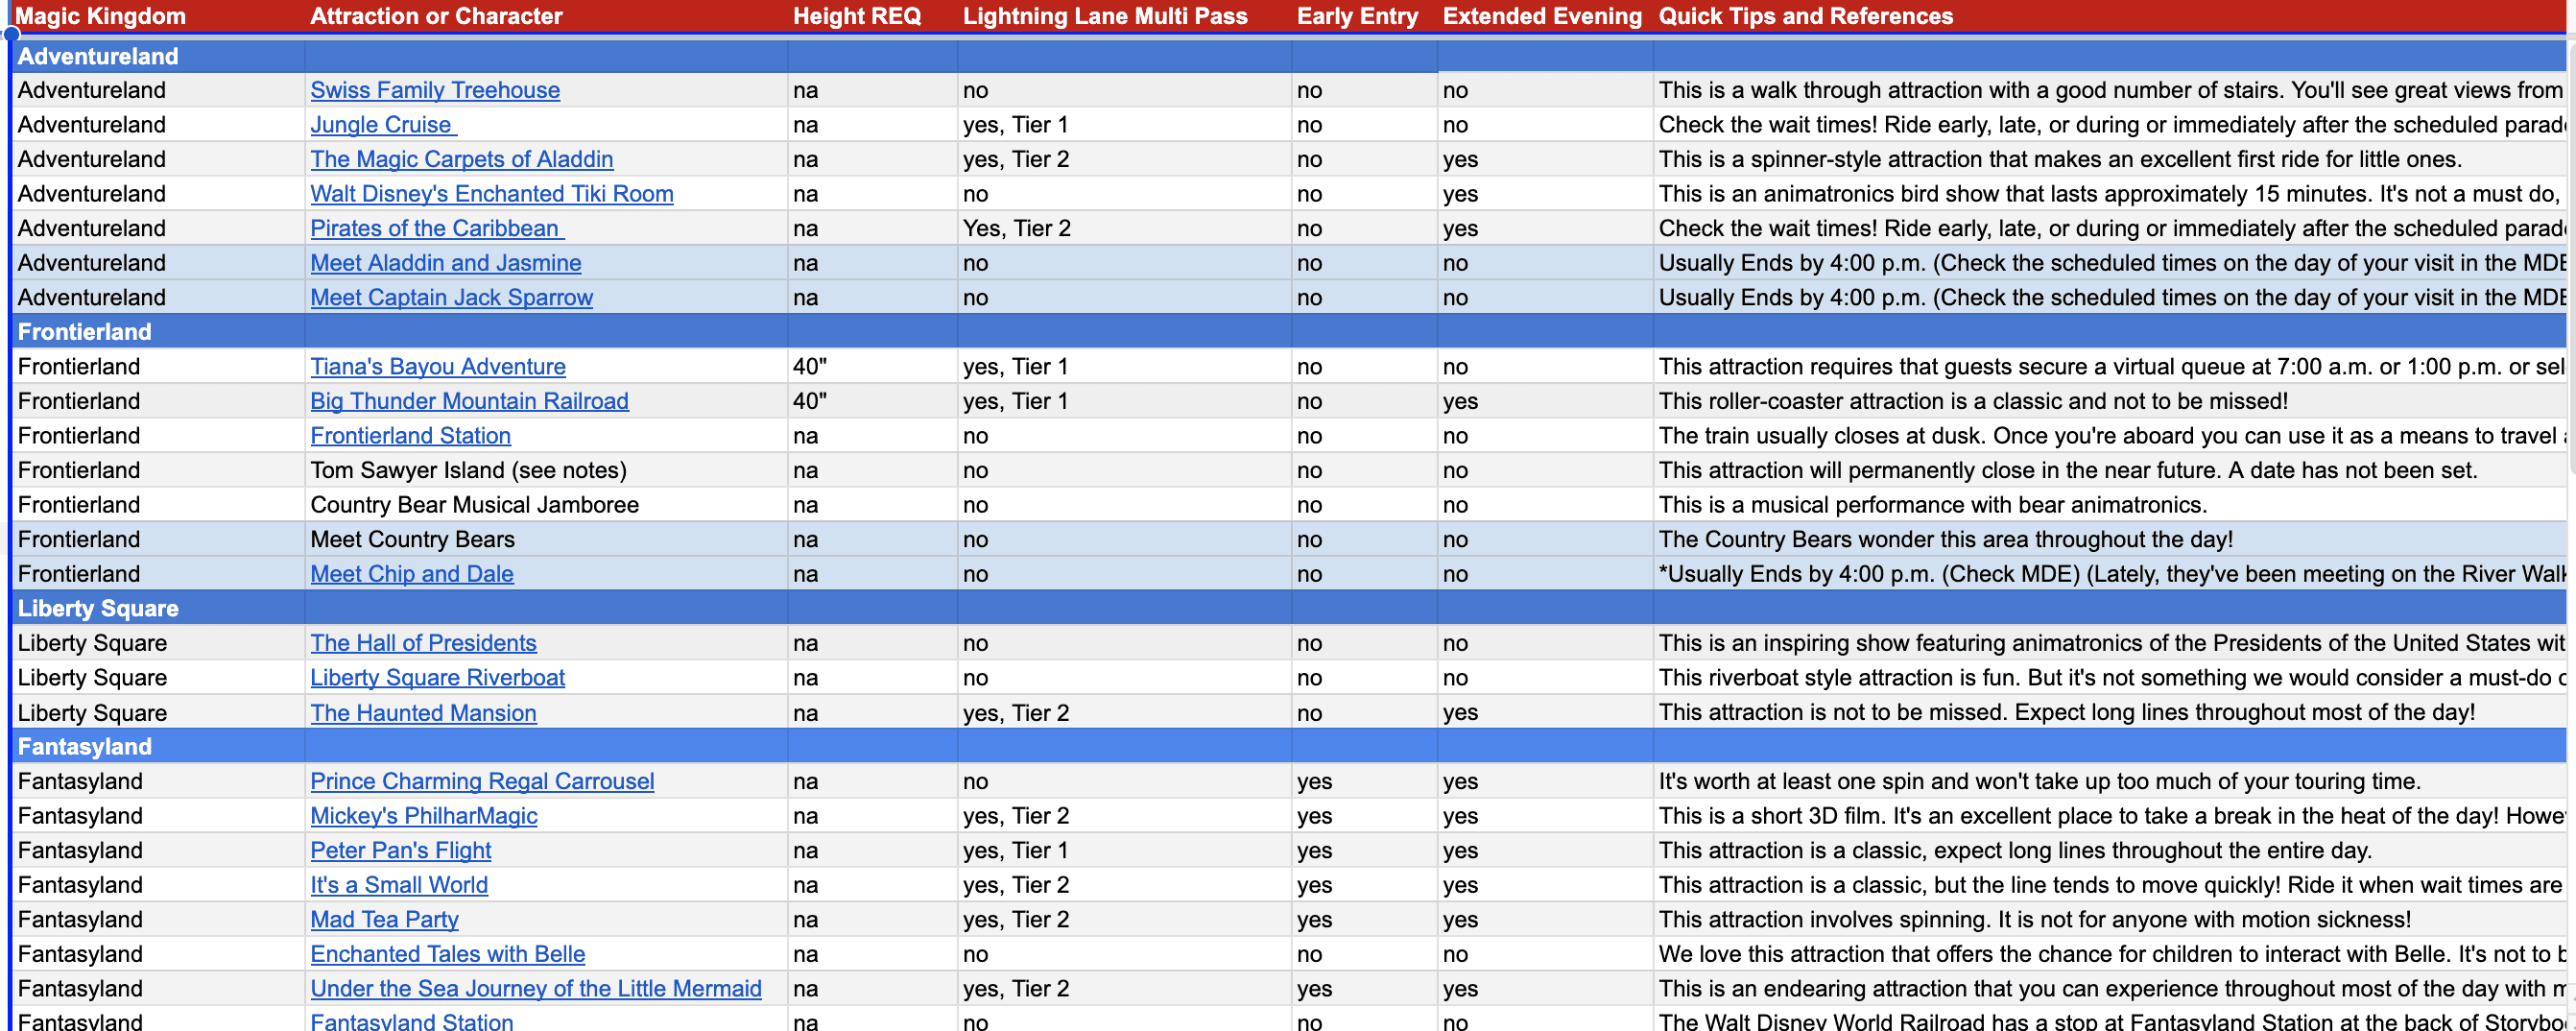
When you select a tab, you’ll see seven columns on the top row from left to right with the following headers: Park/Land, Attraction or Character, Height REQ, Lightning Lane Multi Pass, Early Entry, Extended Evening, and Quick Tips & References. The rest of the sheet is comprised of rows providing specifics for each column.
For example, we can locate the row with Tiana’s Bayou Adventure (under the Attraction or Character Column) on the spreadsheet below. If we look to the left we see the ride is located in Frontierland. To the right, we can see it has a 40″ height requirement, that it’s a part of Lightning Lane Multi Pass (Tier 1), and that it’s not currently offered during early entry or extended evening hours at Magic Kingdom.
You’ll also notice that I’ve highlighted a dark blue row occasionally. The dark blue row indicates a specific land or area of the park. For example, the first dark blue row is for Adventureland. Underneath it, you can find the rides and character meet-and-greets in Adventureland. If you reference this spreadsheet on your phone during your vacation, you’ll be able to see what else is in the same area.
Additionally, the character meet-and-greets are highlighted in light blue to differentiate them from the rides. The rest of the lines are an alternating shade of grey for readability purposes.
As mentioned above, the column for Lightning Lane Multi Pass indicates whether a ride is part of the system. We’ve also listed if it’s a Tier 1 or 2 category attraction where applicable. Of course, you only need to know this status when making initial ride selections before your vacation. If you haven’t learned about Lightning Lanes yet, our Disney World Lightning Lane Guide provides an overview of how the entire system works.
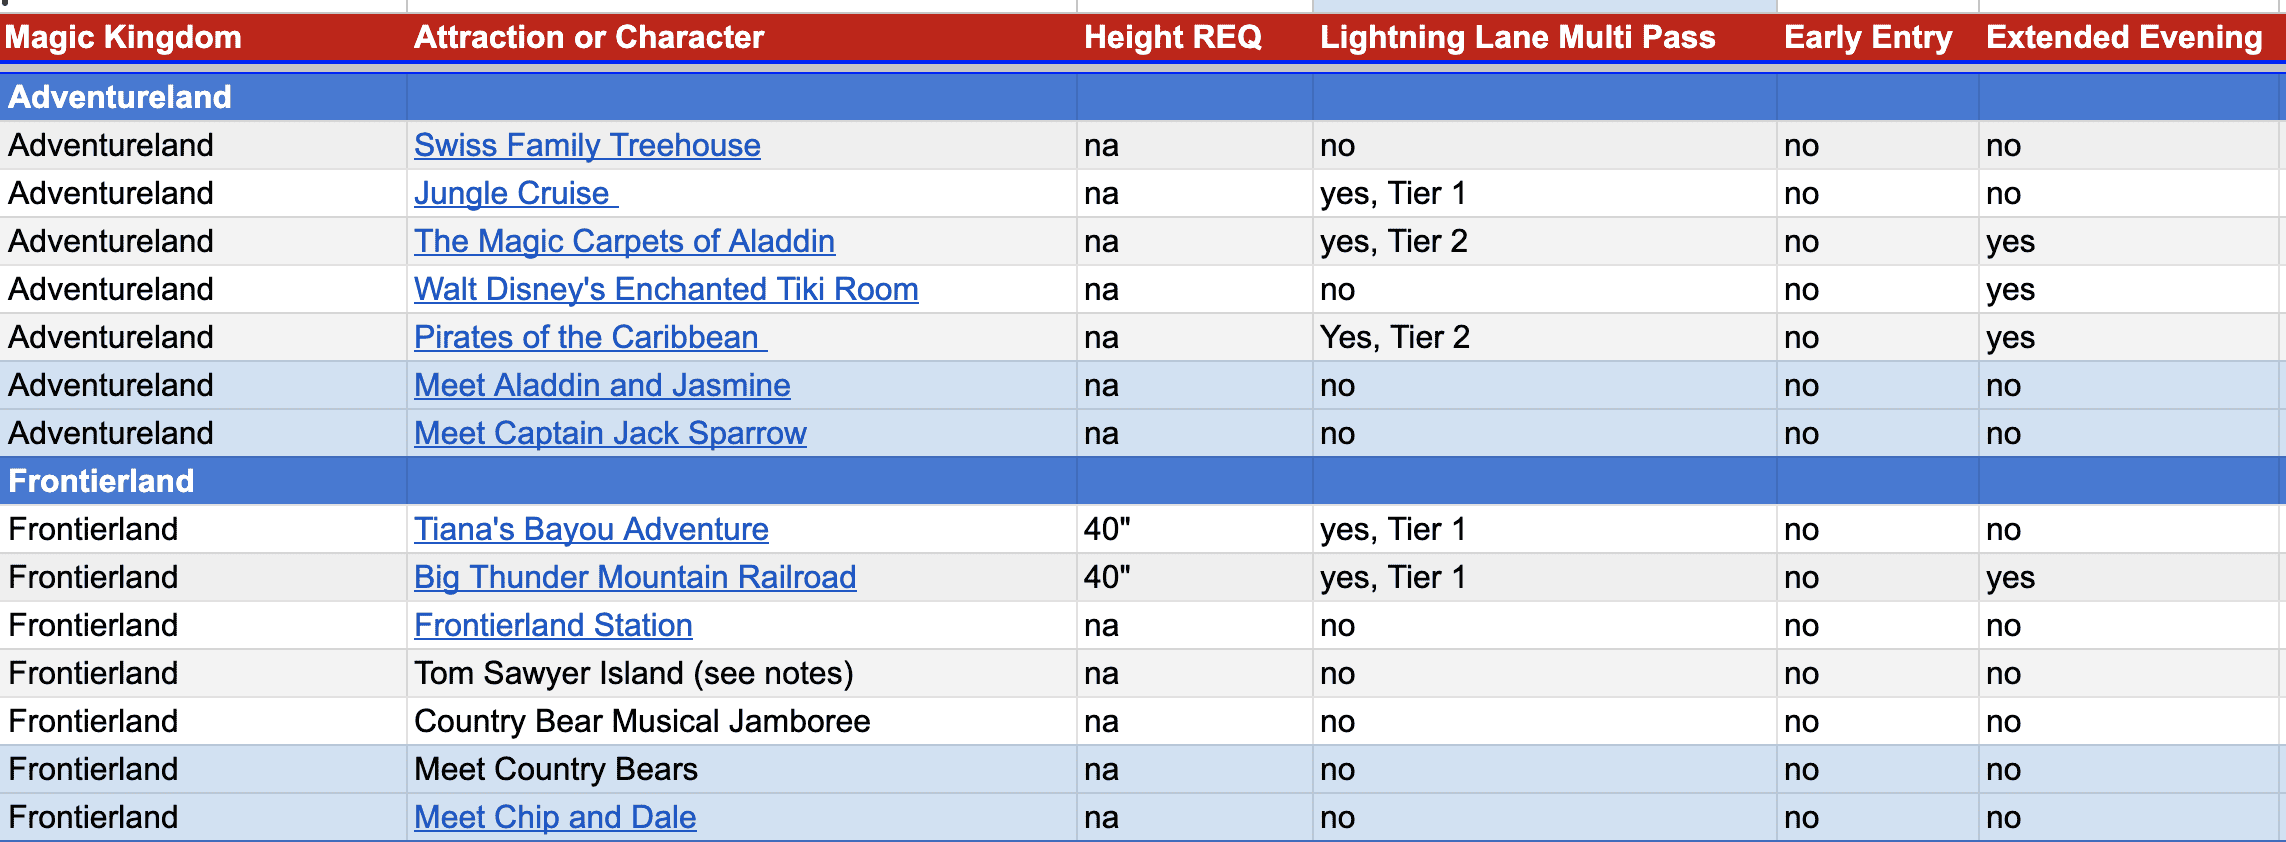
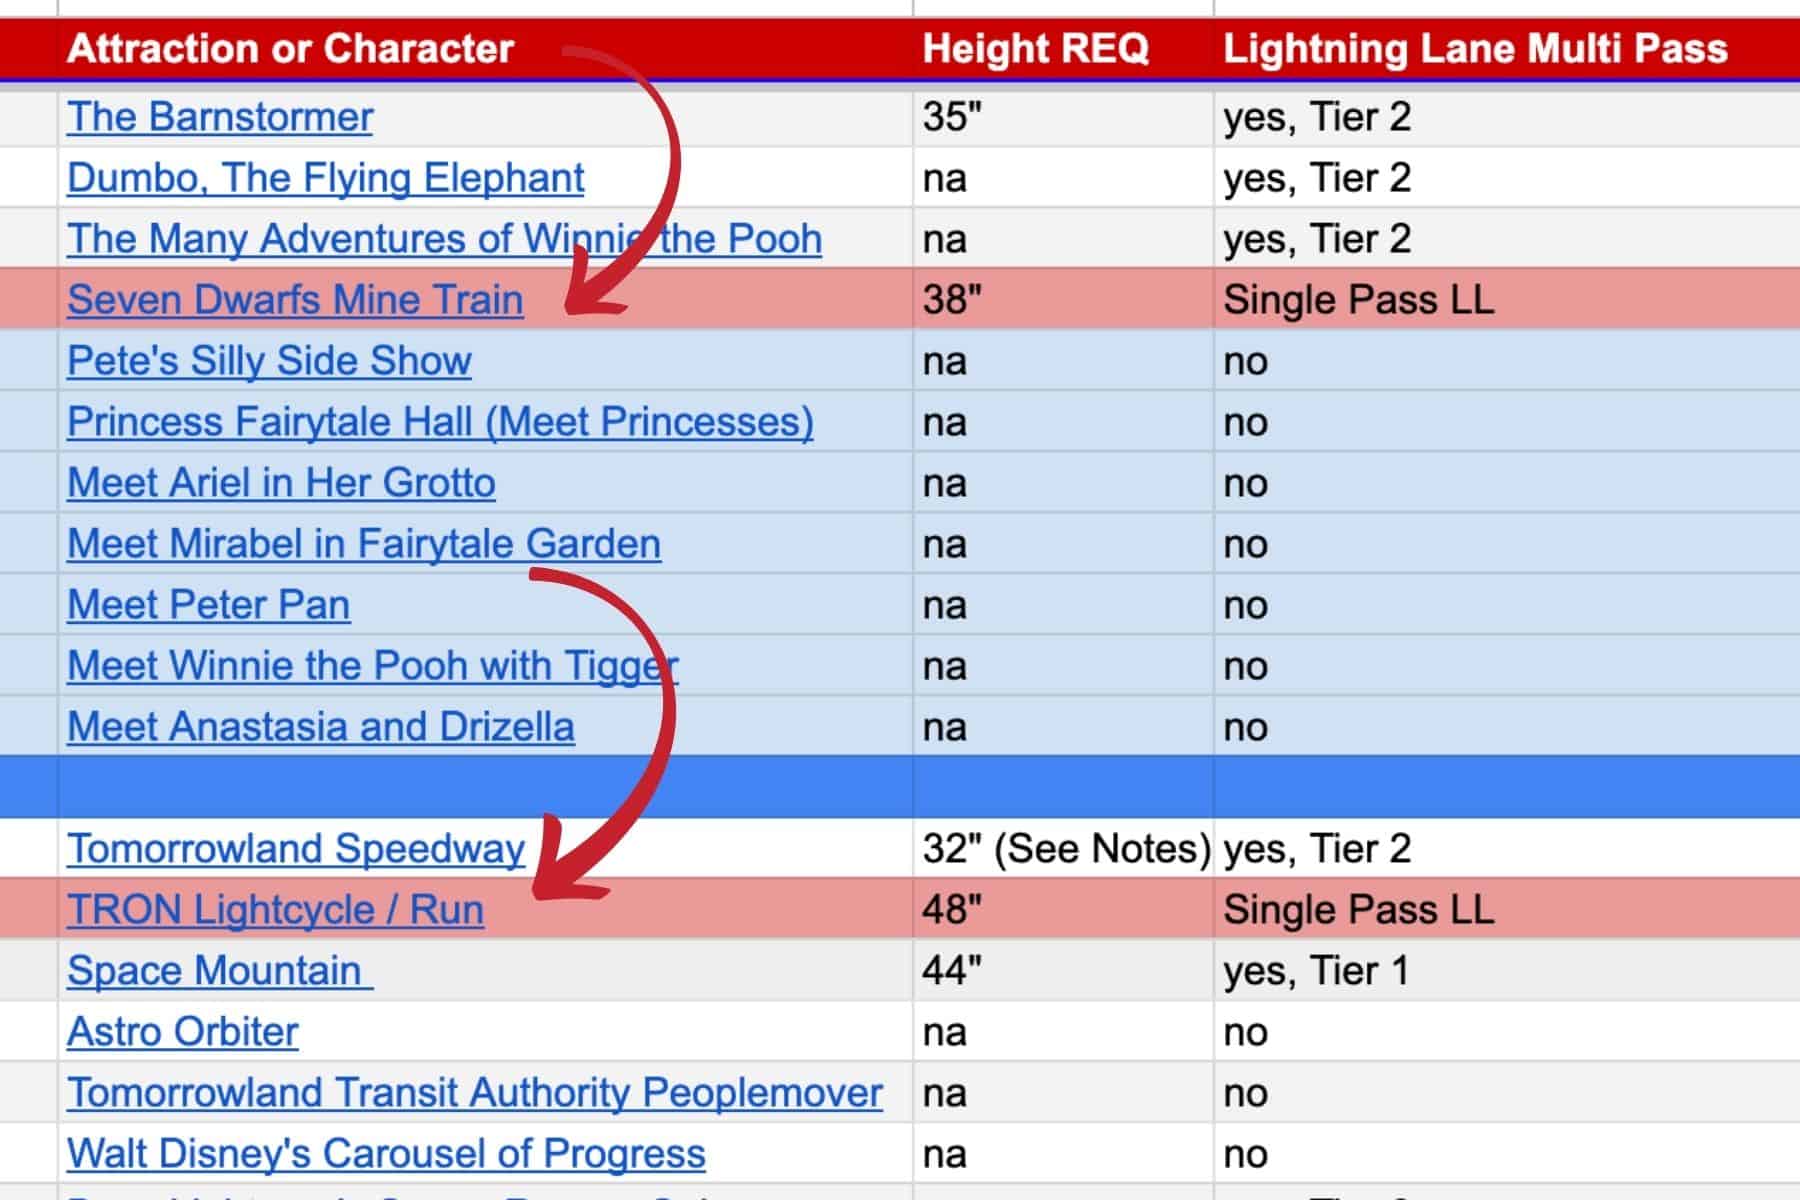
Each park has at least one attraction that’s a Lightning Lane Single Pass. These are rides that require an extra purchase in order to skip the line. We highlighted those rows in red. They are indicated with an arrow on the example below.
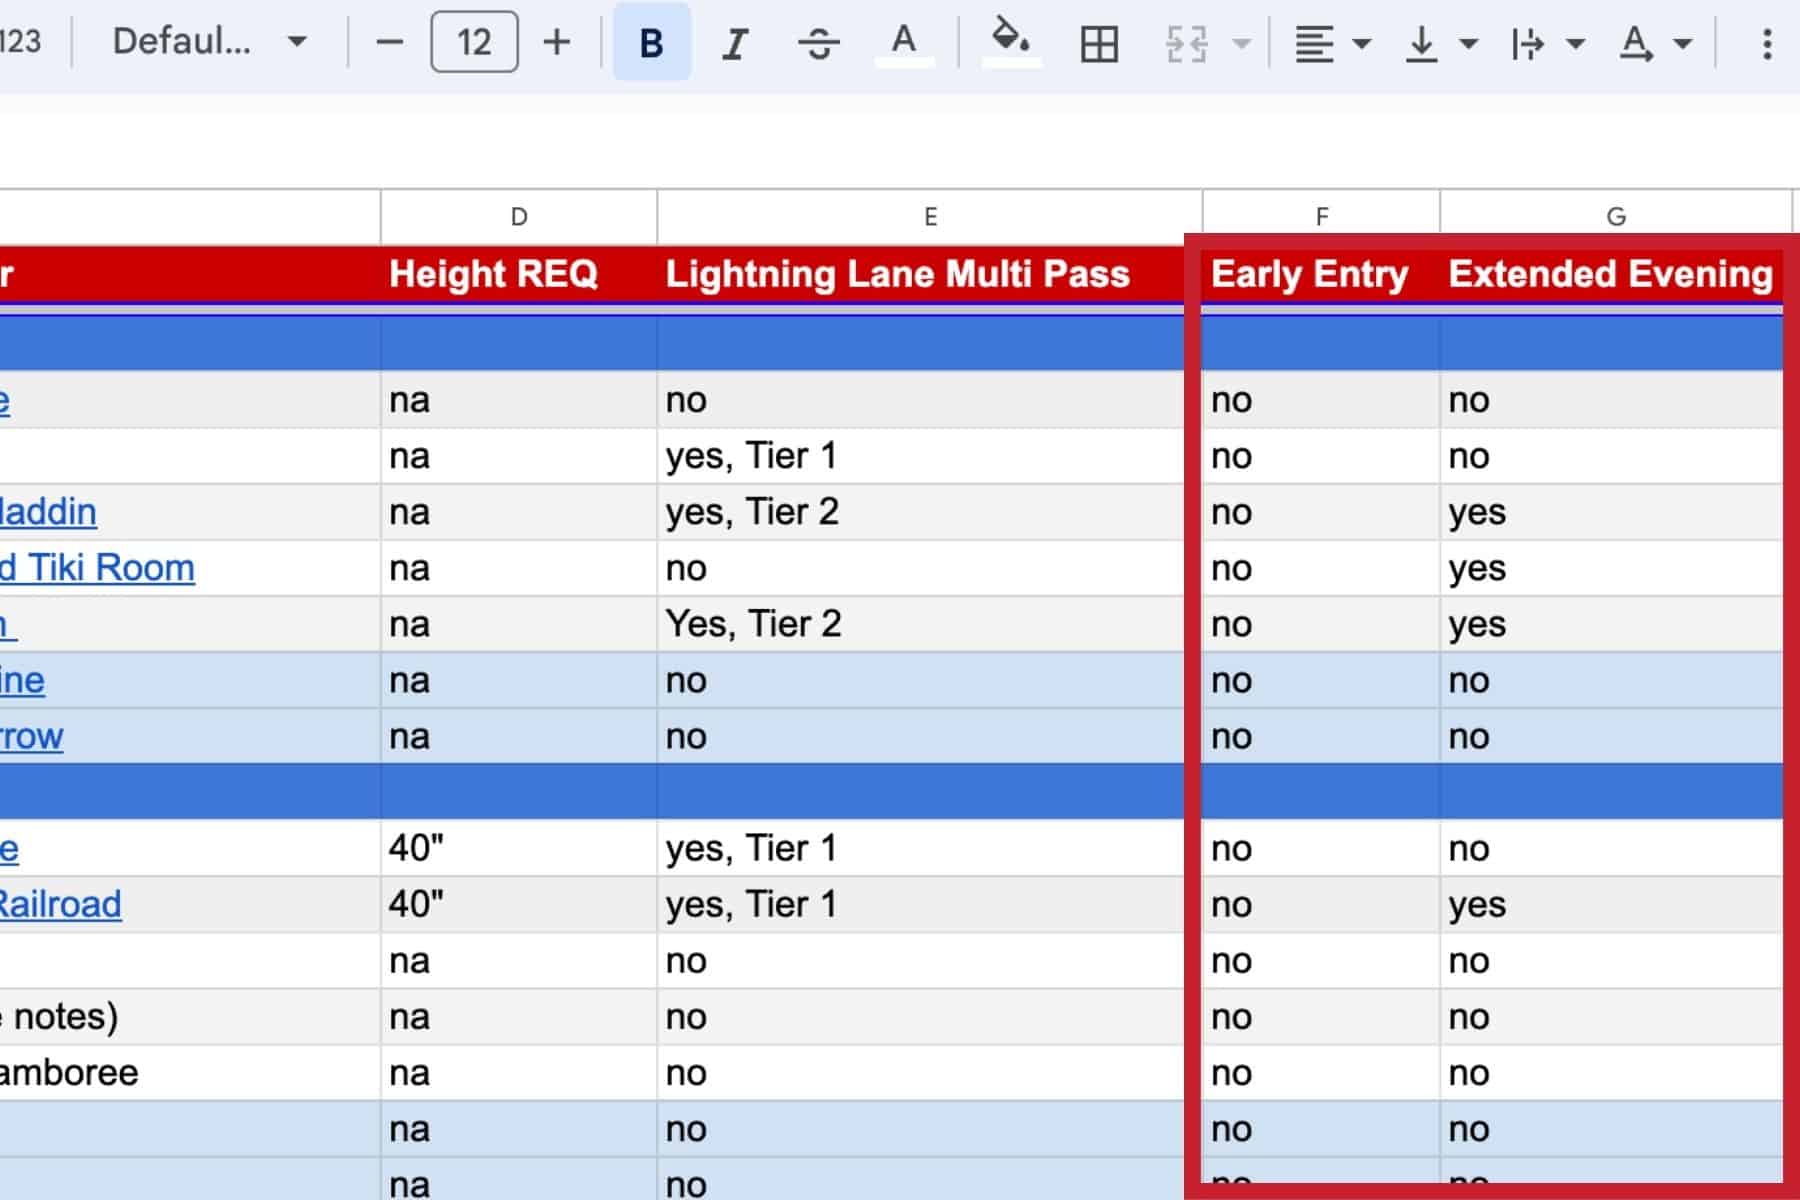
Next on the spreadsheet, we have a column for Early Entry and Extended Evening Hours. These columns may or may not apply to you. You can check the highlighted articles above to determine your eligibility. If you are eligible, you’ll want to:
- a.) Take advantage of these extra hours in the park.
- b.) Be aware of what attractions are available during these special hours.
*Extended Evening Hours are pretty consistently held at Epcot on Monday evenings and Magic Kingdom on Wednesday evenings throughout most of the year. They sometimes shift to Hollywood Studios and Animal Kingdom during the Fall.
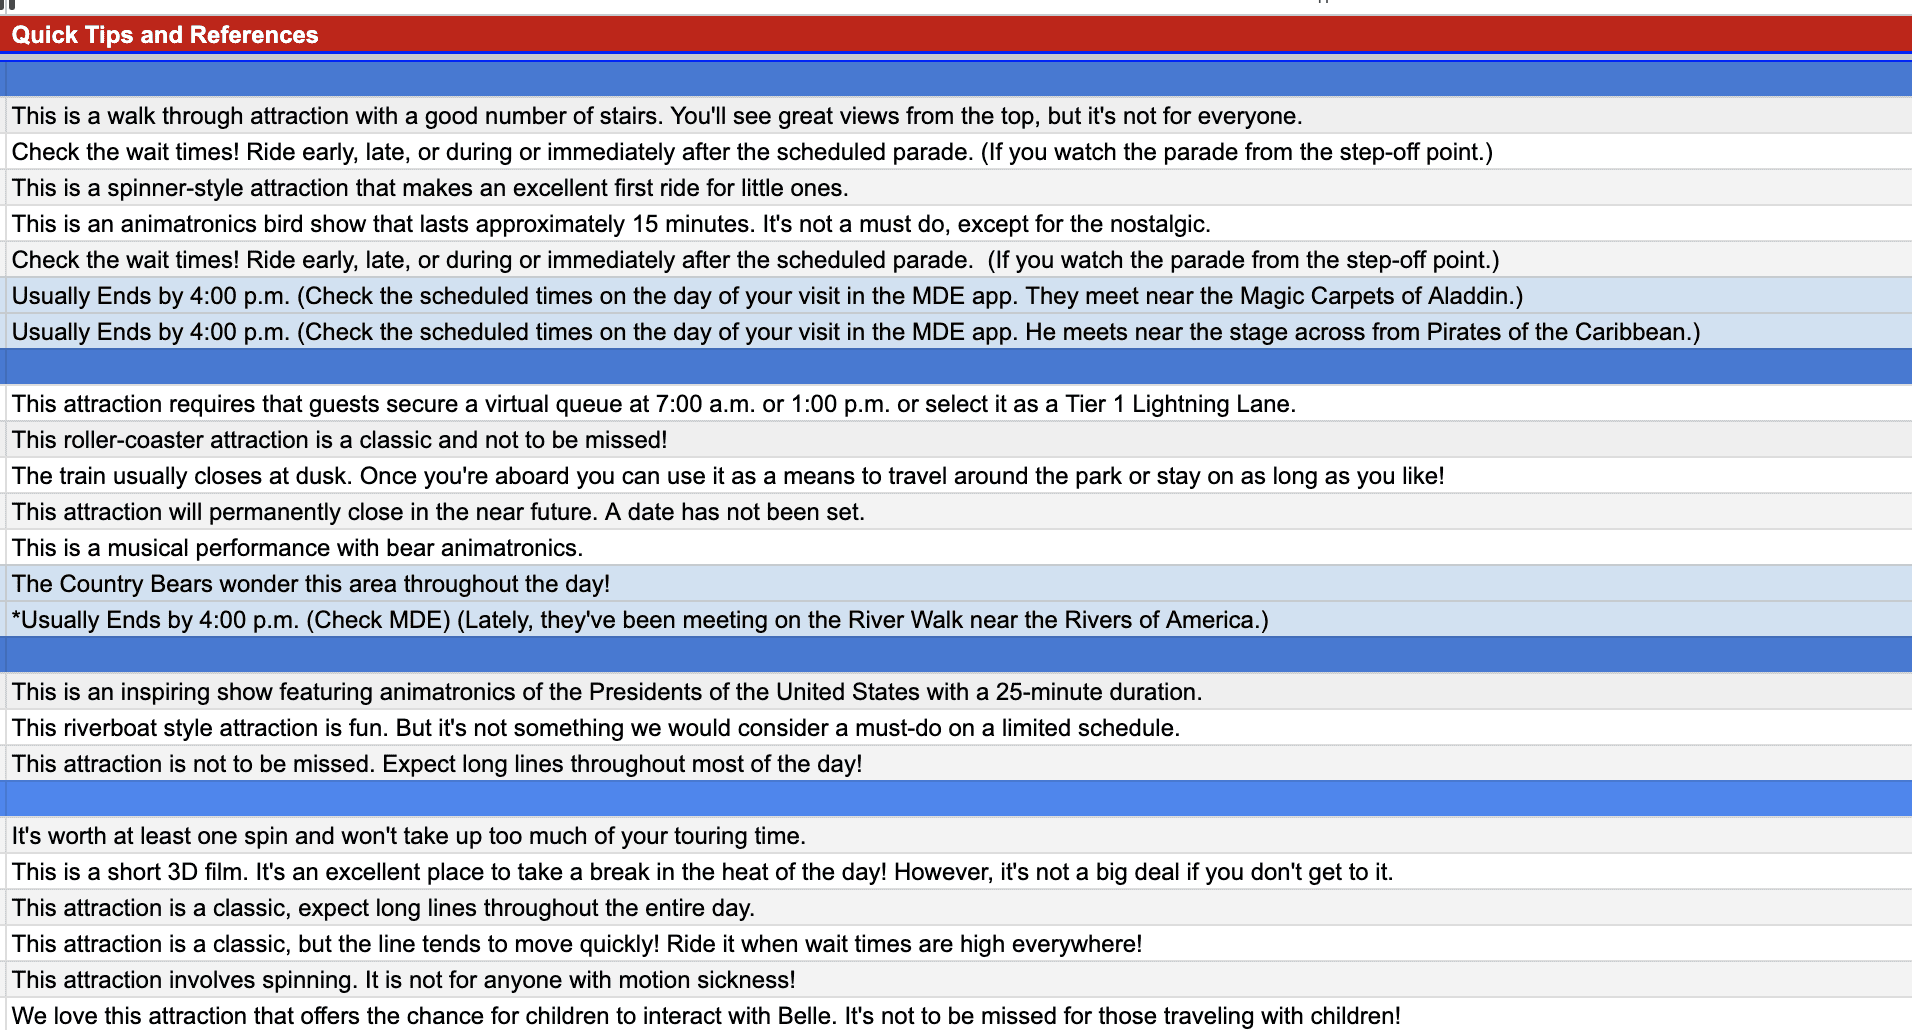
The final column has a few quick tips and references. These are just a few simple things that come to mind from years of experience touring the parks. Some of the tips reference the MDE app. (MDE = My Disney Experience.)
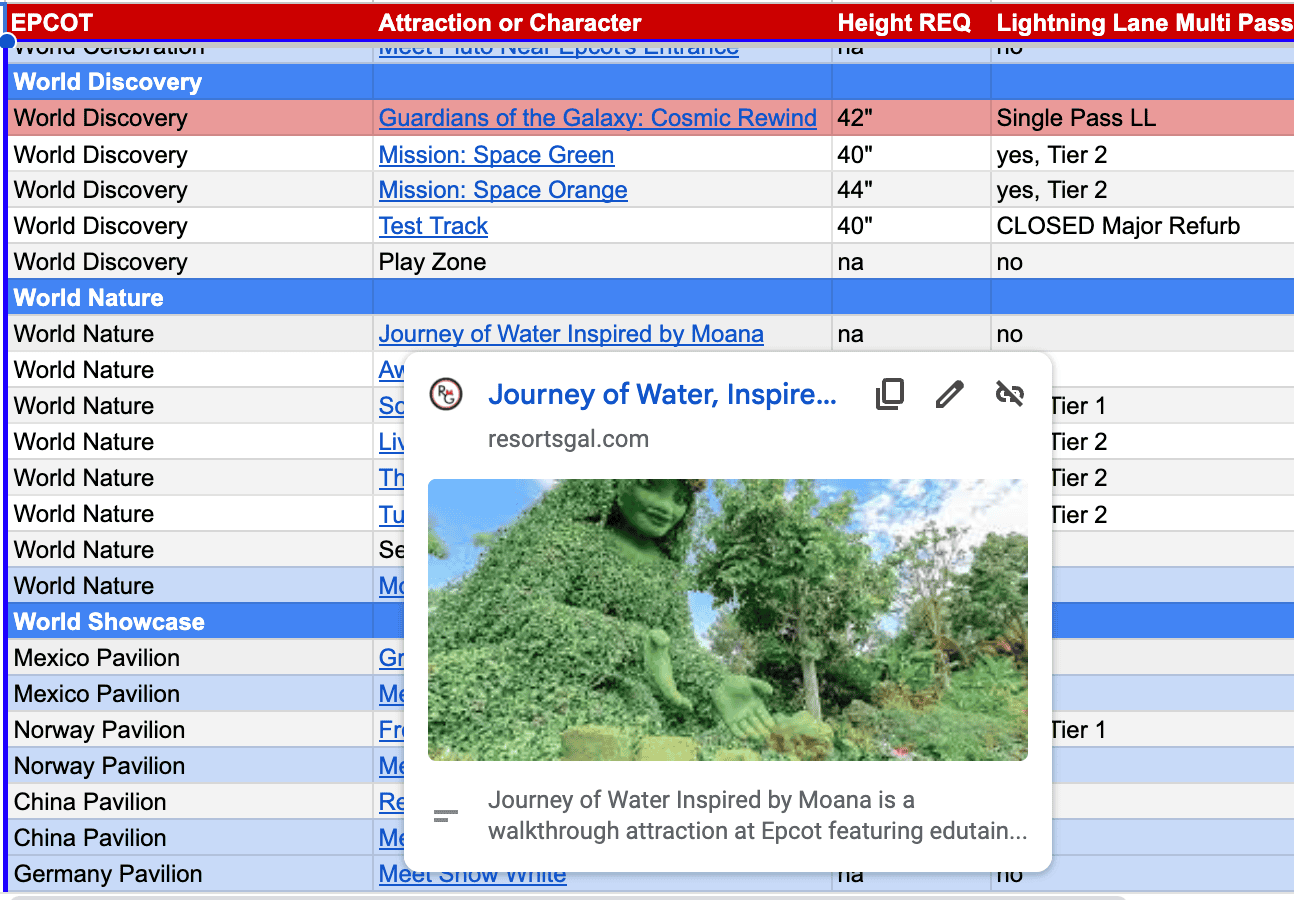
Lastly, if you hover over any of the highlighted attraction names, it will open to our article about that ride. We’ve ranked nearly every attraction with a red or green light (on Resorts Gal) indicating where and when we feel an attraction is worth a long wait. Again, these are just our opinions based on experience. If an attraction is important to you, make sure to read our tips on the best times to ride it.
How To Get our Free Ride Spreadsheet
Sign up below, and we’ll send you access to the spreadsheet along with our best resources for planning.
*Note: The spreadsheet is for all four parks. We’ve listed the instruction guides for the other parks below.
Final Thoughts
We hope you find this spreadsheet helpful in your planning process. Here is the list of instruction guides for each park:
- Magic Kingdom Ride Spreadsheet
- Epcot Ride Spreadsheet
- Disney’s Hollywood Studios Ride Spreadsheet
- Disney’s Animal Kingdom Ride Spreadsheet
In the Comments
Have you had a chance to use our free Disney World ride spreadsheets? We would love to hear your feedback. Let us know below in the comments.


